How to Make Deer Camp Venison Chili Recipe
To make deer camp venison chili, start by sautéing diced onions, chopped bell peppers, and minced garlic until tender. Brown quality ground venison in the mix, then stir in canned tomatoes, kidney beans, and spices like chili powder and cumin. Simmer this hearty blend for at least an hour to meld the flavors. Serve hot, topped with shredded cheese or fresh cilantro. There's even more to discover about making the perfect chili you'll love!
Ingredients Needed for Venison Chili
When you're ready to whip up a hearty pot of venison chili, gathering the right ingredients is essential for a rich, flavorful dish.
Start with quality ground venison; it's lean and packed with protein, offering numerous venison benefits like lower fat content compared to beef.
Next, you'll need aromatic vegetables like onions, garlic, and bell peppers to build a savory base.
Don't forget canned tomatoes and kidney beans, which add depth and texture.
Spice it up with chili powder, cumin, and maybe a dash of hot sauce for extra kick.
Remember, chili variations can include different beans or veggies to suit your taste, so feel free to customize.
With these ingredients, you're on your way to a delicious meal!
Preparing the Venison
When it comes to making delicious venison chili, selecting quality meat is essential.
Look for fresh cuts with a vibrant color and minimal sinew, as these will enhance the flavor and texture of your dish.
Once you've got the right venison, mastering proper preparation techniques will elevate your chili to a whole new level.
Selecting Quality Venison
Selecting quality venison is essential for crafting a delicious chili that truly showcases the meat's rich flavors. When it comes to meat selection, consider these key factors to guarantee you're getting the best:
- Source: Look for venison from reputable suppliers or hunters who practice ethical hunting.
- Age: Younger deer typically yield more tender and flavorful meat, so aim for fawns or yearlings.
- Appearance: Choose cuts that are bright red with minimal dark spots, indicating freshness.
- Fat Content: Opt for lean cuts with a thin layer of fat, which enhances flavor without being greasy.
Proper Meat Preparation Techniques
Preparing venison properly is essential for achieving a tender and flavorful chili. Start by ensuring your meat handling techniques are on point; always use clean utensils and surfaces to avoid contamination.
Cut the venison into uniform pieces, which will help it cook evenly. Consider using marinating techniques to infuse flavor and tenderness—acidic ingredients like vinegar or citrus juice can break down tough fibers. Let the meat marinate for at least a few hours, or overnight for best results.
When you're ready to cook, pat the venison dry to promote browning. This initial step will help lock in juices, creating a rich, hearty base for your chili.
With the right preparation, your venison chili will be a crowd-pleaser!
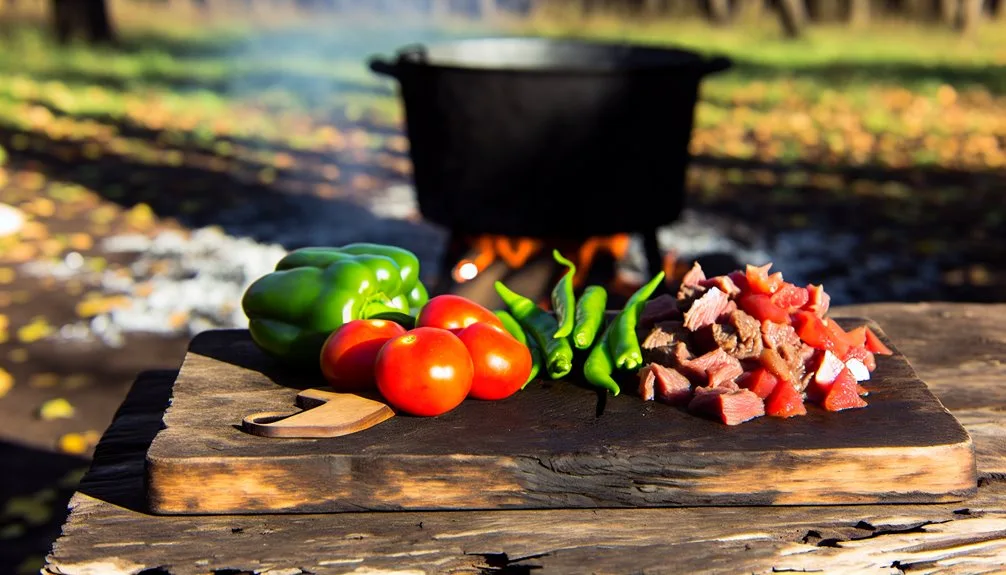
Chopping the Vegetables
Chopping the vegetables is an essential step that sets the foundation for your venison chili's flavor and texture. Selecting the right vegetable varieties and mastering effective chopping techniques can elevate your dish considerably.
Here's how to get started:
- Onions: Dice them finely for a sweet, aromatic base.
- Bell Peppers: Chop them into bite-sized pieces for a pop of color and crunch.
- Garlic: Mince it finely to infuse the chili with robust flavor.
- Carrots: Slice them thinly; they'll add a subtle sweetness and texture.
As you chop, keep your knife skills sharp and your cuts consistent. This not only improves the presentation but guarantees even cooking, enhancing the overall taste of your venison chili.
Cooking the Base of the Chili
Sauté the chopped onions, bell peppers, and garlic in a large pot over medium heat to kick off the cooking process. This simple cooking technique allows the vegetables to soften and release their natural sweetness, creating a flavorful base for your chili.
Stir them frequently, ensuring they don't stick to the pot or burn. As they cook, you'll notice the delightful aroma filling your kitchen, a clear sign that flavor enhancement is underway.
Once the veggies are tender and translucent, it's time to add your ground venison. Brown the meat, stirring occasionally, which not only adds depth to the dish but also locks in moisture.
This foundational step sets the stage for a rich and hearty chili.
Adding Spices and Seasoning
Once your venison is browned and ready, it's time to elevate the flavor profile of your chili by adding spices and seasoning. This is where the magic happens, and getting the seasoning ratios just right can make all the difference.
Consider these key spices to create a well-balanced chili:
- Chili Powder – Adds warmth and depth.
- Cumin – Gives an earthy, nutty flavor.
- Garlic Powder – Enhances the overall taste.
- Smoked Paprika – Introduces a subtle smokiness.
Experiment with different spice blends to find your perfect combination, adjusting the amounts based on your taste preferences.
Incorporating the Venison
Now that your spices are ready, it's time to fold in the venison. Choose your favorite venison cuts, such as shoulder or stew meat, for a hearty texture.
Dice the meat into bite-sized pieces, ensuring even cooking and maximizing flavor absorption. As you add the venison to the pot, listen for that satisfying sizzle—it means you're on the right track!
Stir the meat into the spices, allowing those robust flavor profiles to meld. This step is essential; you want the venison to soak up the aromatic blend fully.
Cook it until the meat is browned, which enhances its natural flavors and creates a savory base for your chili.
Simmering the Chili
With the venison nicely browned and infused with spices, it's time to bring your chili to life through simmering. This step is essential for flavor development, allowing the ingredients to meld beautifully.
Here are some effective simmering techniques to get you started:
- Lower the Heat: Reduce the temperature to maintain a gentle simmer.
- Cover the Pot: This traps steam, enhancing flavor while preventing evaporation.
- Stir Occasionally: Give it a stir every now and then to prevent sticking and guarantee even cooking.
- Time It Right: Let your chili simmer for at least 30 minutes, but longer if you can—this deepens the flavors even more.
Embrace the process, and watch as your chili transforms into a hearty masterpiece!
Serving Suggestions
Now that your venison chili is simmered to perfection, it's time to think about how to serve it up.
Consider vibrant toppings like shredded cheese, fresh cilantro, or a dollop of sour cream to enhance the flavors.
Pair it with crusty bread or a revitalizing side salad for a complete meal that everyone will love.
Toppings for Chili
As you prepare to serve your hearty venison chili, contemplate how the right toppings can elevate the dish into a flavorful experience.
Adding chili toppings not only boosts presentation but also enhances flavor. Here are some delicious options to contemplate:
- Shredded Cheese: A melty layer of cheddar or Monterey Jack adds richness.
- Sour Cream: This creamy topping balances the spice and adds a revitalizing tang.
- Chopped Green Onions: Sprinkle these for a fresh crunch and mild onion flavor.
- Fresh Cilantro: A handful of chopped cilantro brings a burst of freshness that complements the chili beautifully.
Experimenting with these toppings can turn your venison chili into a personalized masterpiece, making every bite an adventure in flavor enhancement!
Ideal Side Dishes
When serving your venison chili, consider pairing it with sides that complement its robust flavors and enhance the overall dining experience.
A classic cornbread pairing is a must; the slightly sweet, crumbly texture balances the chili's heat beautifully. You can even add jalapeños or cheese to your cornbread for an extra kick.
For a lighter option, explore various salad options. A crisp, invigorating green salad with a tangy vinaigrette can cut through the richness of the chili, providing a satisfying contrast.
You might also try a hearty coleslaw, which adds crunch and creaminess. Together, these sides create a delightful meal that celebrates the savory depth of your venison chili while providing variety on the plate.
Tips for Perfecting Your Chili
Perfecting your venison chili hinges on a few key techniques that elevate its flavor and texture.
Here's how you can achieve that perfect chili:
- Sear the Meat: Browning the venison enhances its flavor, creating a rich base for your chili.
- Layer Your Spices: Add spices gradually to develop a balanced flavor. Start with cumin and chili powder, adjusting to taste.
- Use Fresh Ingredients: Fresh vegetables and herbs brighten the chili, improving both flavor balance and chili texture.
- Simmer Slowly: Allow your chili to simmer for at least an hour. This deepens the flavors and melds the ingredients beautifully.
Storing Leftovers
After savoring a hearty bowl of your delicious venison chili, you might find yourself with some leftovers—no need to worry, as properly storing them can keep the flavors intact for another meal.
First, let the chili cool to room temperature, then transfer it to airtight containers for ideal leftover storage. You can refrigerate it for up to three days or freeze it for future enjoyment.
When you're ready to dig in, use reheating methods like gently warming it on the stovetop or in the microwave. Just be sure to stir occasionally for even heating.
Enjoying your chili again will remind you of that cozy campfire flavor, making every bite feel like a warm hug!
Meet Khadija Sheikh, an avid kitchen specialist with a passion for exploring innovative kitchen gadgets, cooking tools, and remodeling tips. Her culinary journey is an artistry of flavors, where she uniquely combines her love for kitchen intricacies with a special focus on crafting meticulous step-by-step recipes. As a dedicated writer, Khadija not only unveils the secrets behind delightful dishes but also transforms kitchens into creative spaces. Join her a flavorful adventure, where every recipe becomes a narrative, and every kitchen tool tells a story.